
LEXIPORTAL: UPLOADING TEXT DOCUMENTS
1. After creating a Leximancer project, and pressing the "Select Documents" button, right-click / ctrl-click on your user folder, and click the 'Upload Documents' menu option.

2. From the "Text Document Upload" panel that then displays:
Choose "Browse...."
Select a document or zip file (containing multiple documents) and click the "Open" button
In this example, the document selected is "Day14-22_October.txt"

3. The selected file name appears in the File: box.

4. Click on "Add", to put this file into the upload list
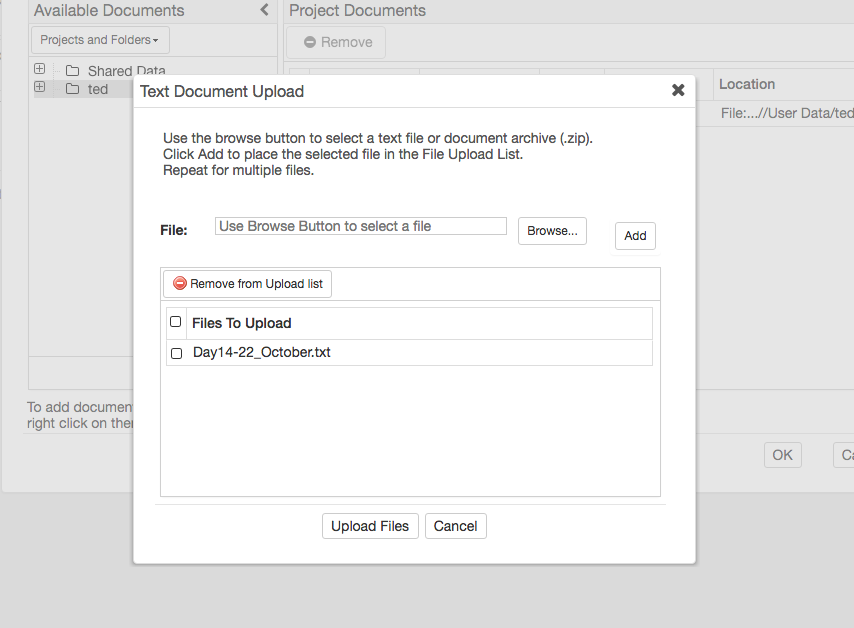
5. Repeat Steps 2 - 4, for each file or zip file set you wish to upload.
6. When all the files you want to upload are in the Files To Upload list, click "Upload Files"
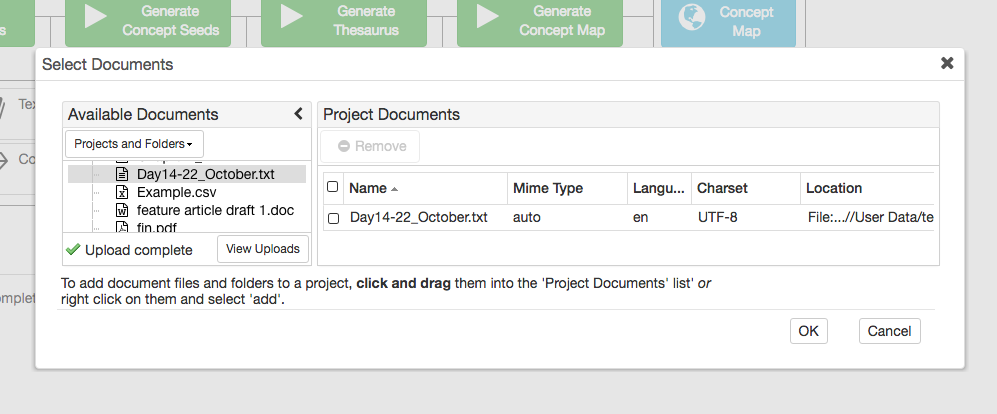
7. Once the file(s) are uploaded, they will appear in the Available Documents List and near the bottom left you will see an "Upload Complete" message with a green tick mark.

8. From the "Available Documents" list, drag the files you want included in the project to the blank area on the right hand side. (Beneath the Name / Mime Type / Language heading row).
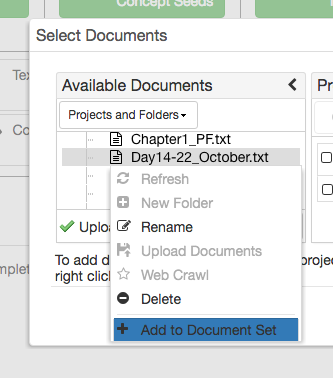
9. You may also right-click / control-click on a document or folder in the Available Documents list, and click the "Add to Document Set" menu item instead of dragging the document name.
10. When finished adding files to the project, Click "Ok" to confirm the files in the Project Documents list for the project.