

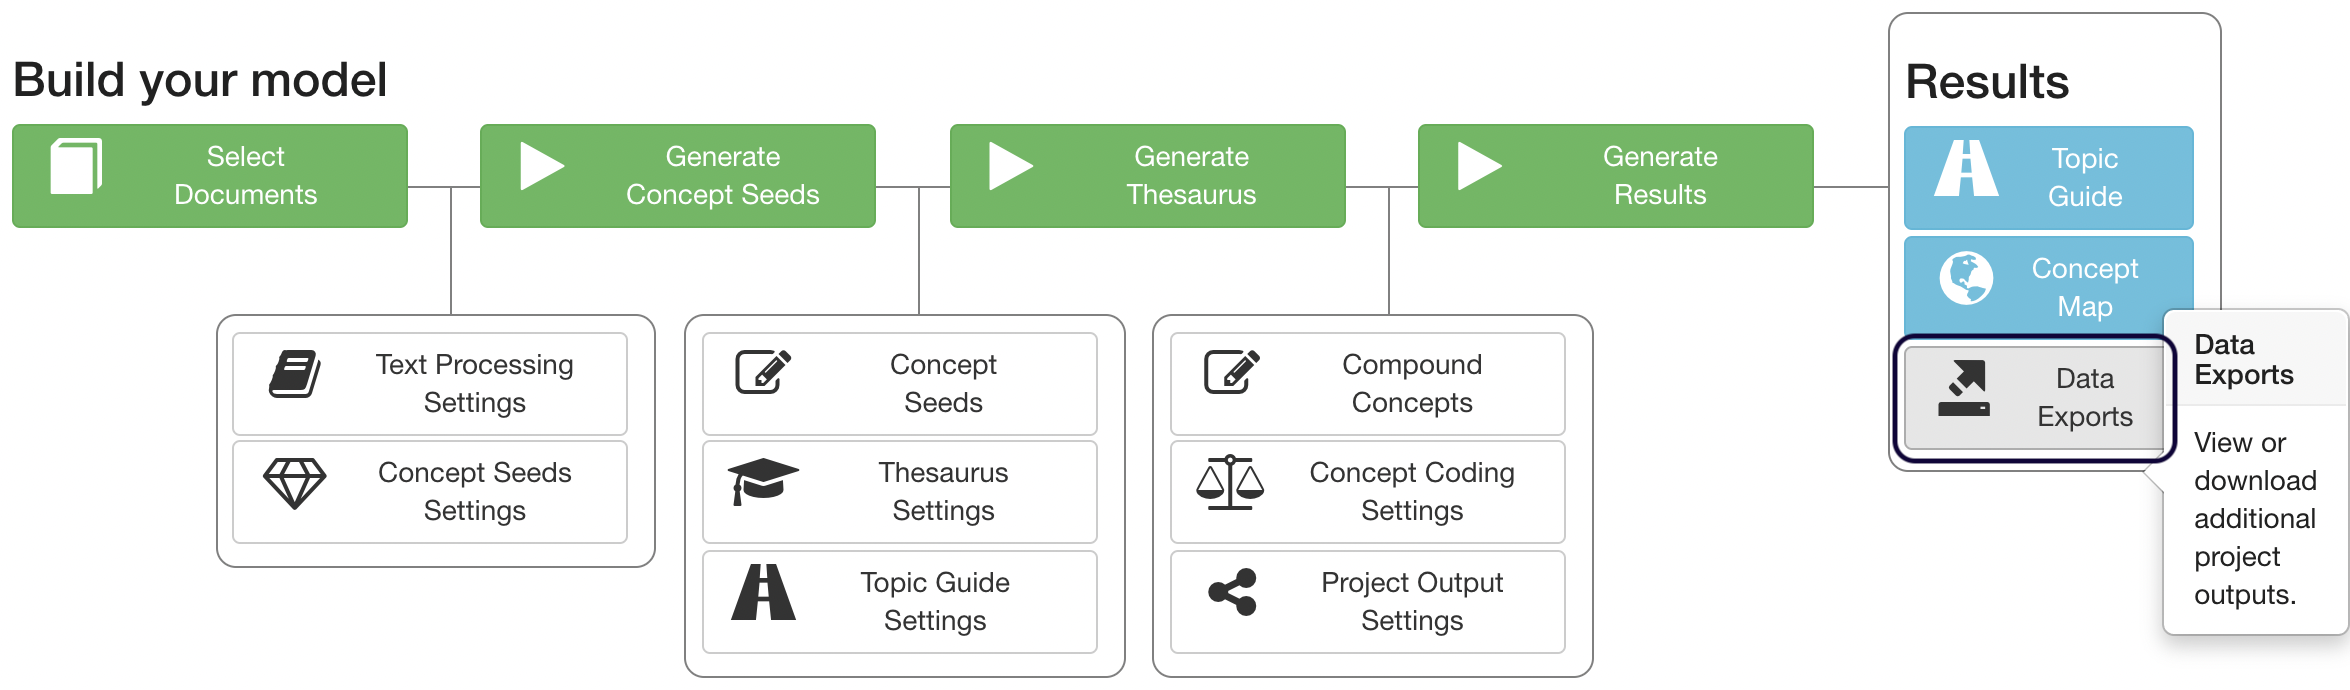
Analysing Survey Data with Leximancer
Step 1
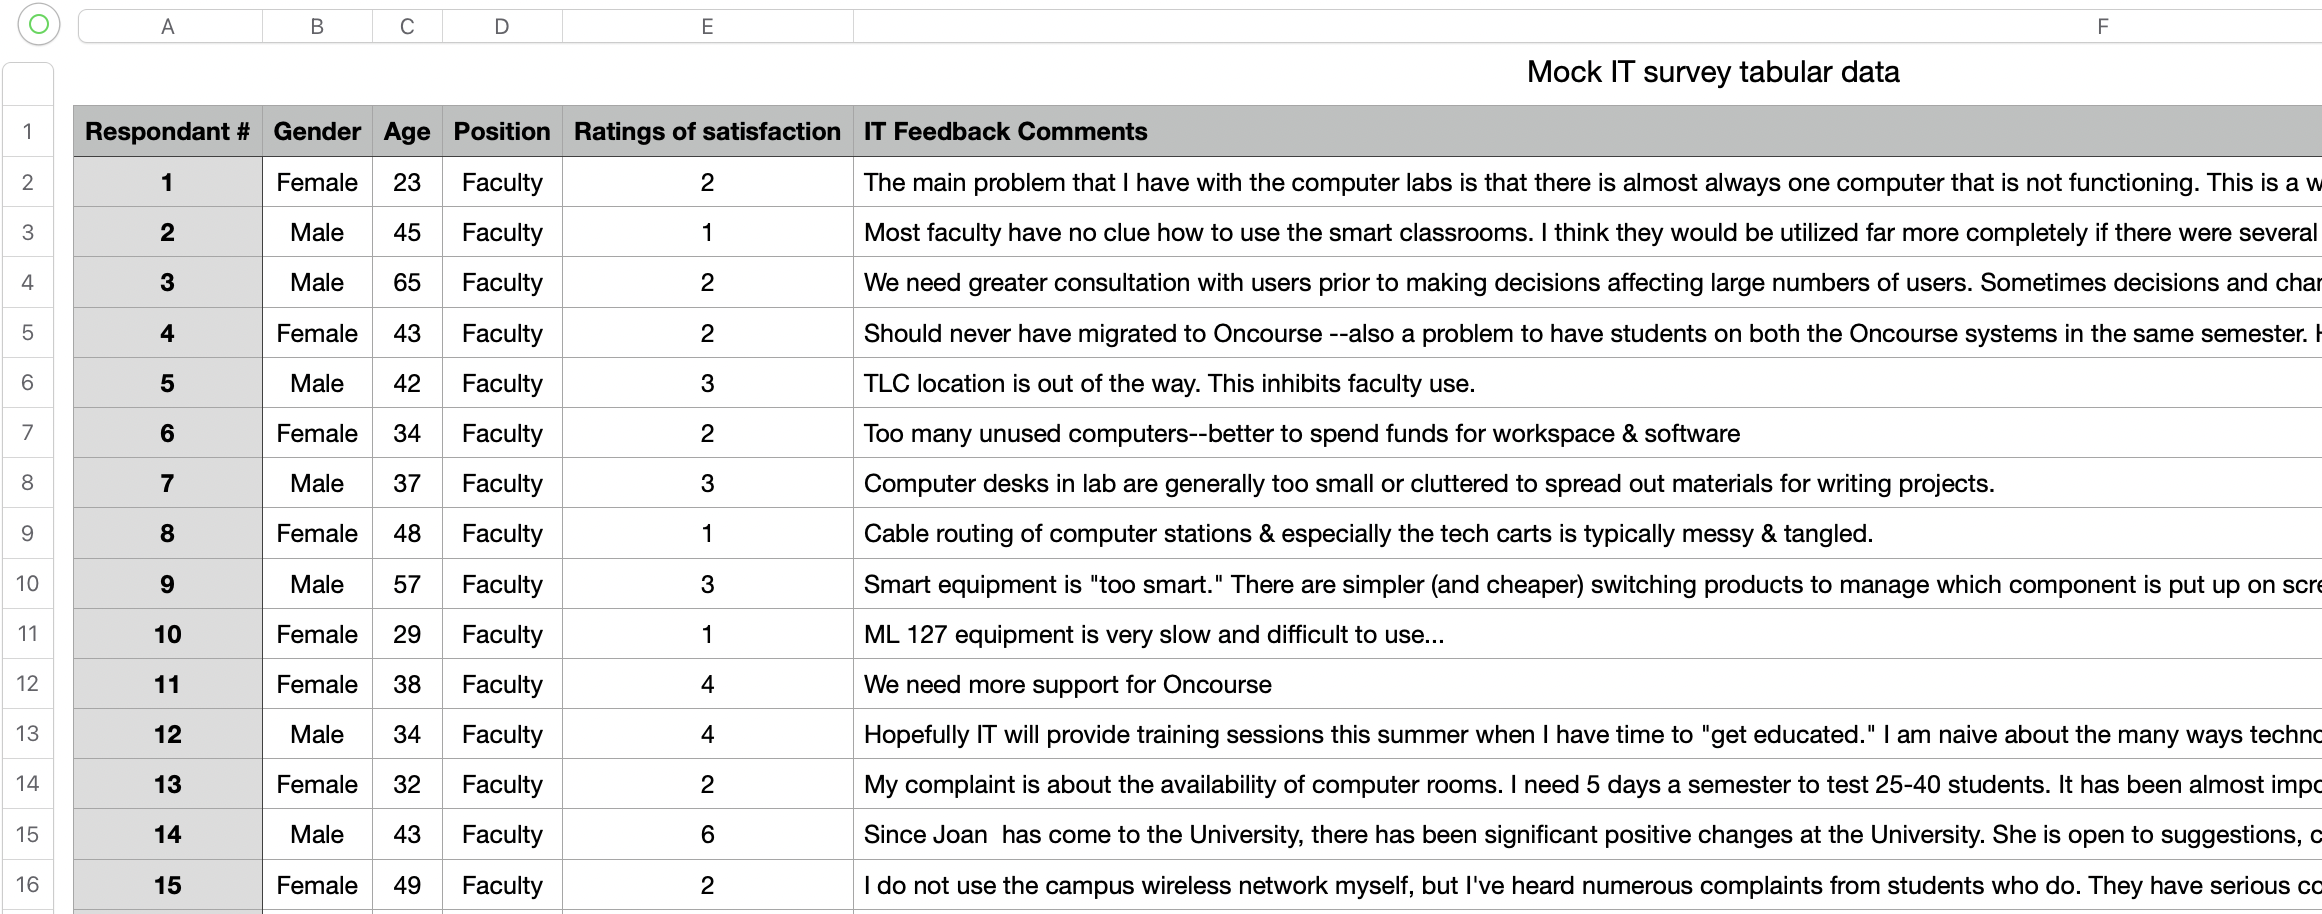
Your data should be in a spreadsheet application such as Microsoft Excel or in a database application such as Access. The spreadsheet must be laid out as follows:
one response item per column;
first line should contain the column headers;
one respondent per row.
Step 2
Save (export) the spreadsheet in delimited text format. This should be a .csv file export (CSV stands for comma separated variables).
Step 3
Create a Leximancer project as usual, and click on Select Documents. Browse and select the CSV spreadsheet file. Drag and drop it into the ‘Project Document List’ area, then click OK. (You may also right-click on the file and select ‘Add to Document Set’.)
Step 4
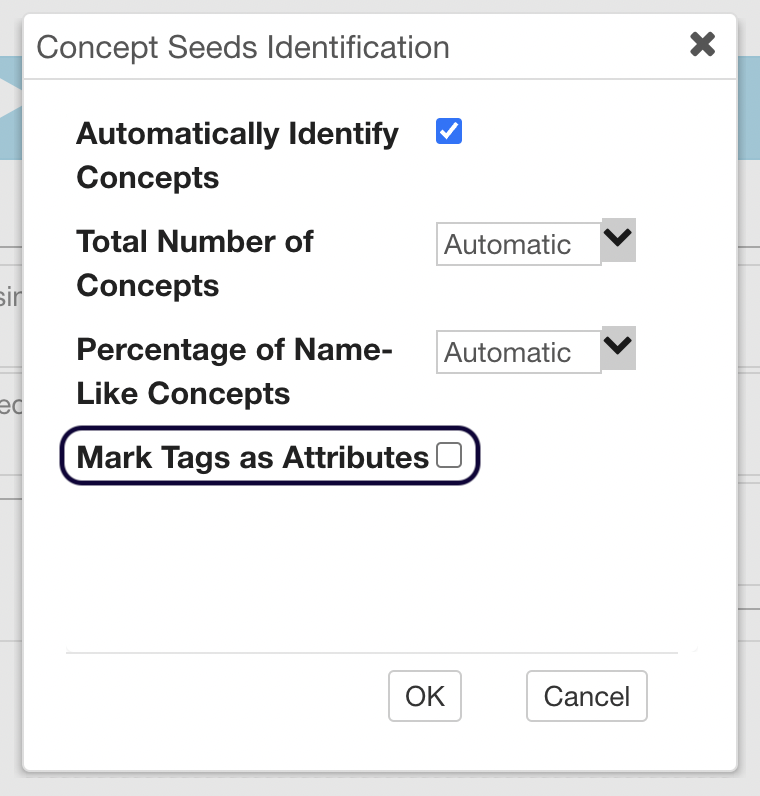
To make the tags to appear on the map itself, you will need to go to Concept Seeds Settings and unticked Mark Tags as Attributes.
Step 5
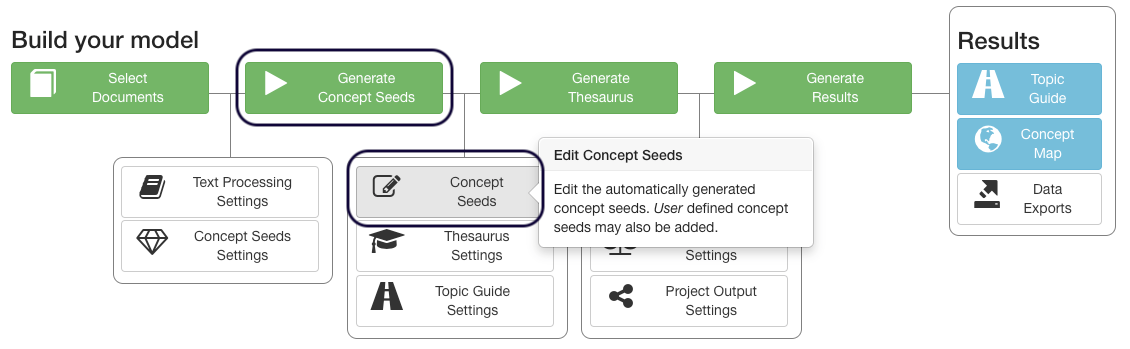
Run the first phase of processing - Generate Concept Seeds then click ‘Edit Concept Seeds’.
Step 6
You will see the concept seeds automatically extracted by the software in the ‘Auto- Concepts’ tab:
If you want more (or fewer) automatic concepts, click Cancel, open the ‘Concept Seeds Settings’ and change the ‘Total Number of Concepts’ to be suggested by Leximancer.
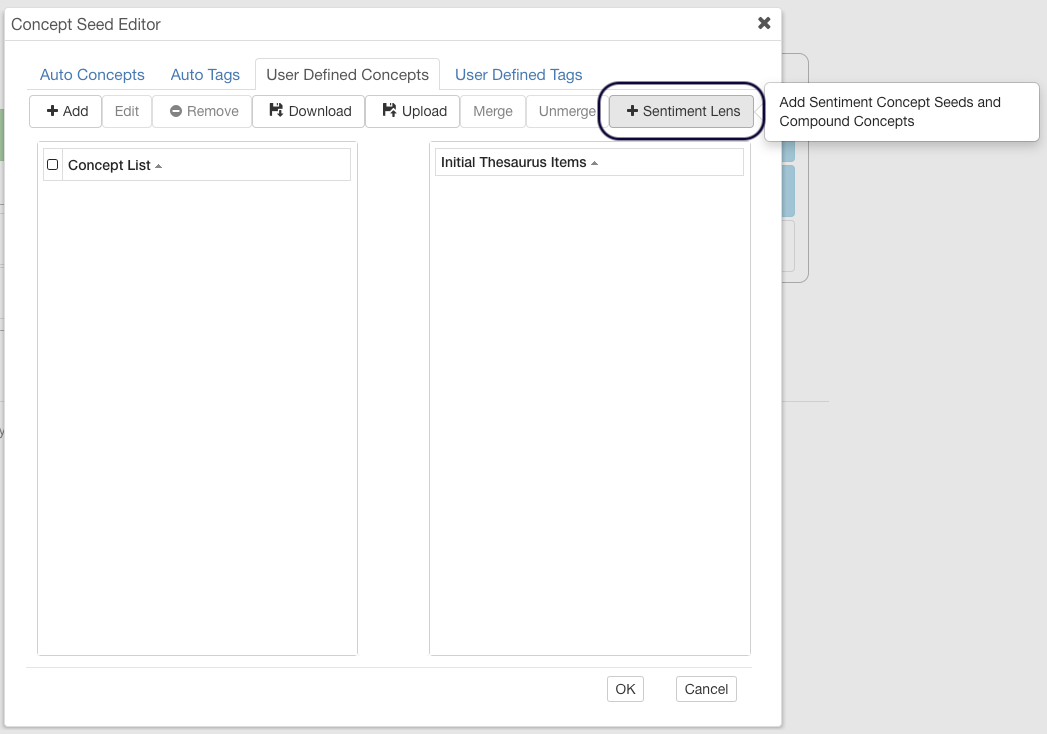
You can optionally seed your own concepts in the ‘User Defined Concepts’ tab. Keep your user defined concept seed words simple and unambiguous at this stage.

Note: If you want to construct Frames later on, in Step 8, you should add the requisite concept seeds in the ‘User Defined Concepts’ tab, and remove them from the ‘Auto Concepts’ tab.
Optionally, if you want positive and negative sentiment measurement, go to the ‘User Defined Concepts’ tab and press the ‘Sentiment Lens’ button:
Leximancer will automatically create a tag to represent each free-text column, and a tag for each of the levels (or possible responses) to the categorical variables in the data (to a limit of 500 unique responses). Entries that read ‘@none’ represent null entries or empty response cells.
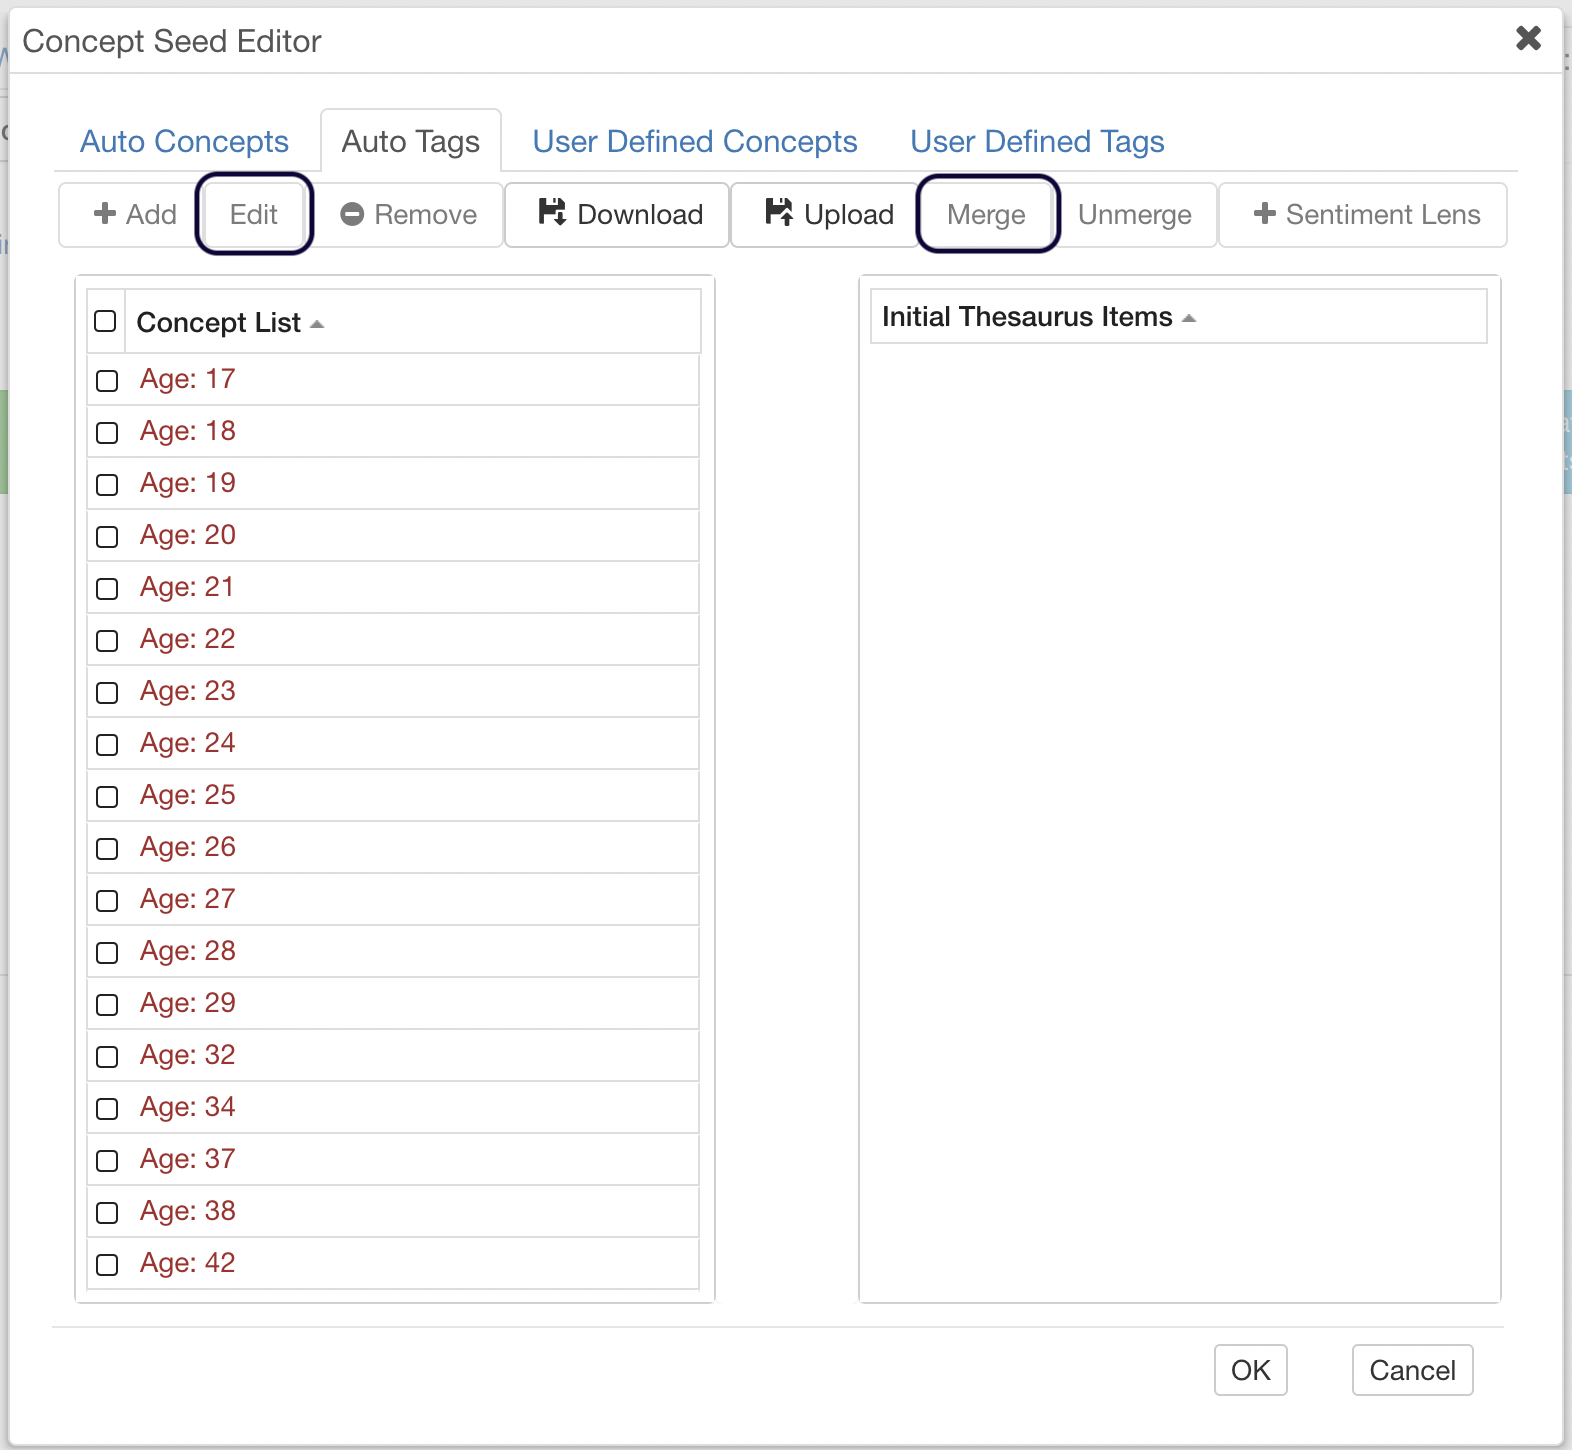
You can review which tags Leximancer has extracted by clicking on the ‘Auto Tags’ tab. The tags take their names from the column headers and categorical responses in the data.
There is no hard limit to the number of free-text and categorical variables that can be analysed in Leximancer. The ‘Auto Tags’ can be used for data mining correlations with textual concepts, and for selecting which text column(s) you wish to map at any time. Optionally, you can aggregate these tag variables at this time using the ‘Merge’ and ‘Edit’ buttons in this tab:
Step 7
Run the Generate Thesaurus phase to extract a thesaurus from the data describing each concept seed.

Step 8
Optionally, if you want to construct frames, themes, or key indicators from the concepts, we strongly recommend that you create the requisite concept seeds in the ‘User Defined Concepts’ tab, as described in Step 6. Clicking the ‘Compound Concepts’ button expands the Compound Concept Editor interface.

Select the boxes for any concepts you wish to combine into compound concepts. There are lists of all tags, name concepts and word concepts in the left and centre columns. Move them across to the compounding workbench by clicking the ‘Add’ button:

Combing the concepts using the ‘AND’ operator requires both concepts to appear in the same (2- sentence) piece of text for the compound to be coded.
After moving the concepts you wish to combine into the right column, tick both of them again and click the ‘AND’ button in the header:
Hover your mouse over the compound concept to see the equation defining it.
Use the same method to combine concepts with the Boolean operator ‘OR’. Using the ‘OR’ conjunction means that evidence for your compound concept will be calculated to include evidence for either of your concepts.

Note: Concepts used to build a compound remain available as singular concepts in the project results as well (unless you exclude the constituent concepts from the ‘Mapping Concepts’ list in the ‘Concept Coding Settings’).
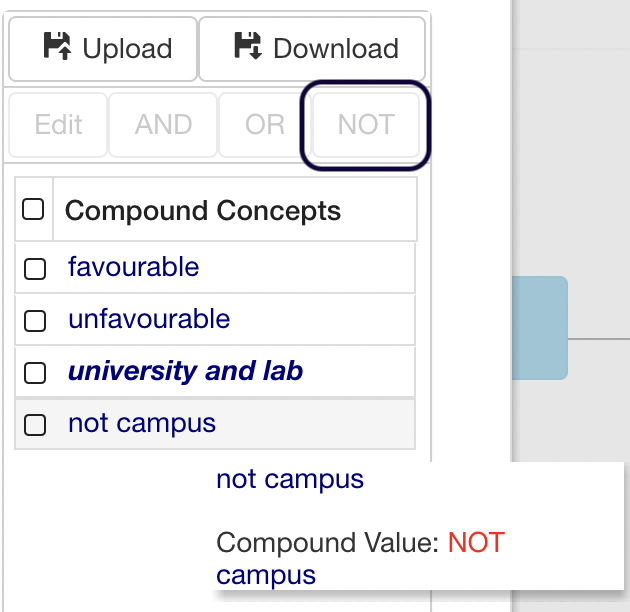
To make a compound concept using the ‘NOT’ operator, first select the concept you wish to negate. The ‘NOT’ button at the top of the column will become available. Clicking the ‘NOT’ button will negate the concept you have selected:

You can now combine the negated concept with another concept by following the steps for combining concepts with ‘AND’ as outlined above. Doing so will include instances of the positive concept, and exclude instances of the negated concept:
The same procedures apply to building more complex Sentiment concepts. This step is done automatically when you click ‘Sentiment Lens’ in the ‘Concept Seeds Editing’ interface. For example, the Sentiment Lens creates a compound concept for Positive Sentiment that includes favourable terms and excludes negation terms:
You can specify different rules for coding sentiment by combining the concepts used as building blocks for the Sentiment Lens (‘favterms’, ‘unfavterms’, ‘negationterms’) in different ways if you wish.
Finally, by selecting a compound concept and clicking ‘Edit’ you may: edit the name (specify whether it is a name-like or word-like concept) and whether it should be treated as sentiment.


Note: Sentiment terms will not appear on the map, but will be present in the report tabs to the right of the map.
Compound concepts will automatically appear on the map if they are regular word concepts. Name-like compounds need to be specifically added to the ‘Mapping Concepts’ list in the ‘Concept Coding Settings’.
If you want to use your own custom compounds again, in the same or another project, you should download and save the compounds list and the requisite seeds list, using the ‘Download’ buttons at the top of the editor screens.
Step 9
Edit the ‘Concept Coding Settings’ to access the data mining and export options.

The ‘Mapping Concepts’ list lets you select which variables, including compound concepts, you want in your model, like choosing the columns you want in a database query.
For example, let’s say you wish to examine the correlations of the three position types (faculty members, staff and students) with the comments from the text column called ‘IT feedback comments’ in the data. You would like all the textual concepts on the map, so retain the ‘All Concepts’ wildcard in the ‘Mapping Concepts’ list.
You would also need to select and add the three respondent type tags (Position: Faculty, Position: Staff and Position: Student) to the ‘Mapping Concepts’ tab using the ‘Add’ button left arrow:

Optionally, you can also use the ‘Required Concepts’ and ‘Kill Concepts’ tabs in the ‘Concept Coding Settings’ to filter records in or out of your analysis. For instance, if you had more than one text column in your spreadsheet, you could choose to examine the concepts associated with a particular text response.
You would do this by moving the tag denoting the text column of interest into the ‘Required Concepts’ tab. In this case, if a data cell does not come from that text column, it will not be coded with any concepts or tags.
A ‘Kill Concept’ is almost the opposite of a ‘Required Concept’. If a text segment matches a ‘Kill Concept’ tag or concept, it will not be coded with any concept or tag. For example, you could suppress the analysis of all text segments which match the concept ‘available’ by identifying ‘available’ as a ‘Kill Concept’.
Step 10
Next, enable the export of Leximancer coded survey responses by using the ‘Concept Coding Settings’ button and choosing the ‘Options’ tab.
Set ‘Generate Text Excerpt Classifications’ to ‘Concept List’ and optionally enable ‘Include Text Excerpts in Text Excerpt Classifications’.

Step 11
Now, run the last phase of processing: Generate Concept Map.
Step 12
To find your exported survey data, open ‘Data Exports’.
Go to item 3 ‘List of pairs of Concepts within each Text Excerpt’. Click ‘Download’ and choose the second option ‘Ranked CSV’.

Step 13
You can also open the data exploration interface by pressing the blue ‘Concept Map’ button on the right of the project control panel. Concept maps that include tag variables can look something like this:

Getting Help?
You can access the Leximancer v5.0 user manual via the Help menu, top-left of screen in the software or the click here.

If you have a specific question, please feel free to contact us via our webform, and request help.
We hope that you will enjoy working with Leximancer.